Facial Recognition Windows Form
Creating Facial Recognition using Emgu CV within a Windows Form
This is a setup guide in how to get facial recognition working within a Windows Form project.
Setting up the project
-
Create a new Windows Form (.NET Framework) project

-
Add the following Emgu CV NuGet package to the project.
-
Run an initial build of the project to ensure bin and debug directories are created.
-
In your project’s
WindowsFormsFaceRecognition\WindowsFormsFaceRecognition\bin\Debugdirectory create a new folder namedHaarcascade. -
The following XML file containing serialized Haar Cascade detector of faces needs to be added to the newly created
Haarcascadedirectory. Harr Cascade is one of the more powerful face detection algorithms.
Coding the project
The full source code for the project can be found here
All the code for the facial recognition resides within the FaceRecognition.cs and the Form1.cs classes
The important methods pertaining to the facial recognition are as follows:
DetectFace()
        private void DetectFace()
        {
            Image<Bgr, byte> image = frame.Convert<Bgr, byte>();
            Mat mat = new Mat();
            CvInvoke.CvtColor(frame, mat, ColorConversion.Bgr2Gray);
            CvInvoke.EqualizeHist(mat, mat);
            Rectangle[] array = CascadeClassifier.DetectMultiScale(mat, 1.1, 4);
            if (array.Length != 0)
            {
                foreach (Rectangle rectangle in array)
                {
                    CvInvoke.Rectangle(frame, rectangle, new Bgr(Color.LimeGreen).MCvScalar, 2);
                    SaveImage(rectangle);
                    image.ROI = rectangle;
                    TrainedImage();
                    CheckName(image, rectangle);
                }
            }
            else
            {
                personName = "";
            }
        }
The DetectFace() method works by getting an Emgu.CV Image of the current frame and saving the output to a Mat object (used to store complicated vectors, matrices, grayscale/colour images and so forth). The colour space is also converted from BGR to GRAY. In simple terms, the image is converted to a grayscale image as grayscale images require less complicated algorithms, ultimately reducing computational overhead.
Once the image is converted to a grayscale image the CVInvoke.EqualizeHist(mat, mat) function is called, which takes in our mat object and then makes the algorithm normalise the brightness and increase the contrast of the image.
We then create an array of System.Drawing Rectangle objects and assign it to CascadeClassifier.DetectMultiScale(mat, 1.1, 4) which returns rectangular regions in an image that the cascade has been trained for. In this case the cascade has been provided a frontal face training data set supplied by the following XML.
The next part of the function is relatively self-explanatory. We iterate through our Rectangle array, draw the visual rectangle with CvInvoke.Rectangle(), save the image, set the image ROI (region of interest) to the rectangle capturing the face, and call the TrainedImage() and CheckName(image, rectangle) methods.
TrainedImage()
        private void TrainedImage()
        {
            try
            {
                int number = 0;
                trainedFaces.Clear();
                personLabels.Clear();
                names.Clear();
                string[] files = Directory.GetFiles(Directory.GetCurrentDirectory() + "\\Image", "*.jpg", SearchOption.AllDirectories);

                foreach (string text in files)
                {
                    Image<Gray, byte> item = new Image<Gray, byte>(text);
                    trainedFaces.Add(item);
                    personLabels.Add(number);
                    names.Add(text);
                    number++;
                }

                eigenFaceRecognizer = new EigenFaceRecognizer(number, distance);
                eigenFaceRecognizer.Train(trainedFaces.ToArray(), personLabels.ToArray());
            }
            catch
            {
                // exception handling
            }
        }
The TrainedImage() method operates by iterating through our saved images and then utilising the EigenFaceRecognizer class - a facial recognition class that works with grayscale images. The eigenFaceRecognizer.Train method is called, which, as the name of the method suggests, trains the face recogniser to be trained with the passed in images and labels.
CheckName(Image<Bgr, byte>, Rectangle)
private void CheckName(Image<Bgr, byte> resultImage, Rectangle face)
{
    try
    {
        if (FaceDetectionOn)
        {
            Image<Gray, byte> image = resultImage.Convert<Gray, byte>().Resize(100, 100, Inter.Cubic);
            CvInvoke.EqualizeHist(image, image);
            FaceRecognizer.PredictionResult predictionResult = eigenFaceRecognizer.Predict(image);

            if (predictionResult.Label != -1 && predictionResult.Distance < distance)
            {
                picBoxFrameSmall.Image = trainedFaces[predictionResult.Label].Bitmap;
                personName = names[predictionResult.Label].Replace(Environment.CurrentDirectory + "\\Image\\", "").Replace(".jpg", "");
                CvInvoke.PutText(frame, personName, new Point(face.X - 2, face.Y - 2), FontFace.HersheyPlain, 1.0, new Bgr(Color.LimeGreen).MCvScalar);
            }
            else
            {
                CvInvoke.PutText(frame, "UNKNOWN", new Point(face.X - 2, face.Y - 2), FontFace.HersheyPlain, 1.0, new Bgr(Color.OrangeRed).MCvScalar);
            }
        }
    }
    catch
    {
        // error handling
    }
}
The CheckName(Image<Bgr, byte>, Rectangle) method funtions by passing in an Image<Bgr, byte> which will then be assigned to a local Image<Gray, byte> variable through calling the .Convert() method, which enables the conversion of an image to a specified colour and depth. The image is also resized at this stage, using .Resize() to align the image to the same size of the .JPG images.
As demonstrated before, we utlise the CVInvoke.EqualizeHist(image, image) to normalise the image attributes - brightness and contrast.
Importantly, we utilise the .Predict() method, which takes in an image and predicts the label attribute of the image based on the previously provided training images to the eigenFaceRecognizer object. If a face is detected, we will successfully pass the if check and display the image of the individual through a Windows Form PictureBox. Then we assign the person’s name to the face based on the predictionResult Label field. After this we simply place some text identifying the person’s name utilising CvInvoke.PutText.
Project Demonstration
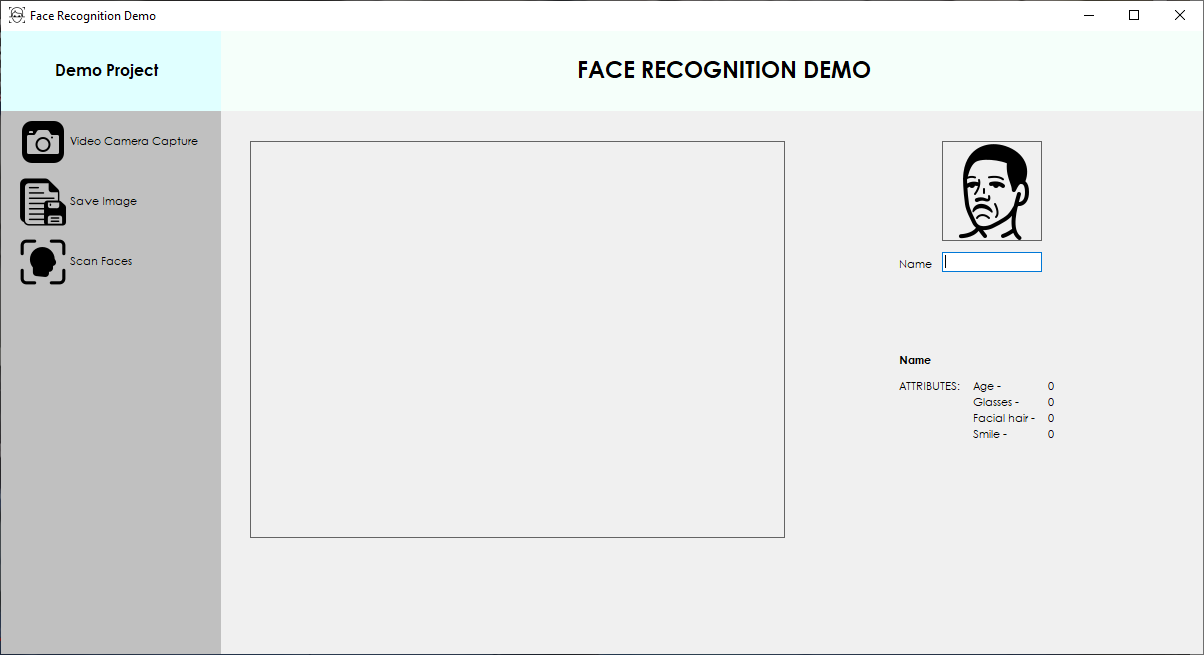
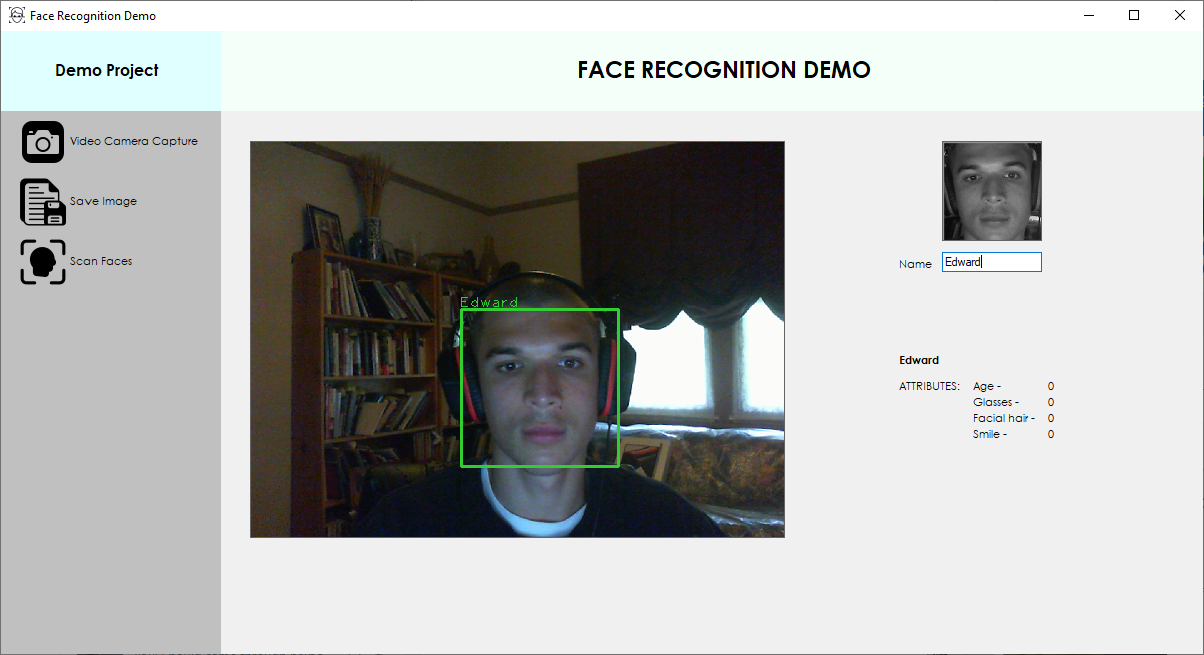
The below image shows the final result of the program.

The three buttons located on the left-hand plane are responsible for all the core program features.
- Video Camera Capture - opens the currently connected webcam
- Save Image - saves a frame from the camera stream and trims the image region to the individual face
- Scan Faces - Enables face detection based on the saved images
After entering a name into the text-box field and saving the image via the Save Image button you are able to use the Scan Faces button and see that the facial recognition is now able to determine who you are!

Conclusion
It is quite clear that through utilising a pre-existing .NET wrapper library to the open source computer vision library, OpenCV, we are able to achieve facial recognition with minimal code, as a lot of the complexity is abstracted away from us due to leveraging the Emgu CV library. This, in tandem with the already optimised XML data set results in us needing only to invoke/call the necessary functions provided by Emgu CV.
In developing this facial recognition program I have not yet been able to implement the Azure Face API. This was primarily due to the restrictions of certain features I wanted to employ. The detection of face attributes, such as, smile, hair colour, facial hair, etc. is currently being limited to Microsoft managed customers and partners due to the responsible AI principles.